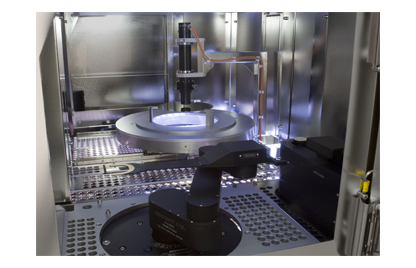
The SIRD systems and SIRIS systems use polarized light, which is transmitted through the substrate material and the depolarization of the transmitted light is measured by two highly sensitive analyzers. The laser beam is scanned across the wafer by means of a rotational stage which is mounted on a linear stage.
The SIRD system measures the depolarization in circular tracks with user-defined resolution. After completing one track, the system indexes the linear stage, moving a user-defined increment and measures the next track. The new SIRIS system uses a continuous linear scanning, hence the measurement is much faster. The systems can measure any wafer size from 50 to 300mm wafer size for the SIRD and even solar cells or odd-shaped substrates by means of an adjustable substrate holder. The measurement range for the SIRIS is mainly 300mm and 450mm wafers.
The SIRIS system as the next generation of inspection system was improved not only for the maximum measurement diameter of 450mm, but also with a mechanically much more stable mount of laser and analyzer and special noise reduction electronics to increase measurement speed and allow measurement of highly doped wafers. Both SIRD and SIRIS can be used on monitor wafers as well as product wafers or even on bonded wafer stacks.
Different levels of automation are provided, starting from the small system with manual loading. In combination with the handling module, the wafers will be transferred to the measurement stage by a pick and place robot with vacuum or edge gripping. Customizing the front tool allows to provide a bridging tool for automatic loading of different wafer sizes or a high-end in-line inspection system with edge grip loading, FOUP load port and complete communication to factory host and OHT.
The SIRD and SIRIS inspection includes not only the measurement but also special analysis programs, so the results will be presented not only in detailed maps but also in numeric values for statistical process control applications. The analytical package allows post measurement analysis for global stress fields, localized defects, analysis of a small area and many more. In combination with the handling unit it even allows the analysis to be run automatically after completion of the measurement.